After a long winter is your skin feeling a little dry? Too much cold weather and central heating can play havoc with our skin.
Or has the summer sun left your skin needing some help? Either way, body butter is a great way to help moisturise your skin.
We love to make whipped homemade body butter to soothe our dry skin. It's super simple to make, feels so soothing and luxurious and hydrates dry skin like nothing else.
If you've tried other homemade whipped body butter recipes without any luck then we're here to save the day!
We've developed and tested a lot of body butter over the years. We've compiled the best 3 body butter recipes and ordered them from easiest to hardest.
Contents
- What is body butter
- Why make homemade body butter
- Adding essential oils to your body butter
- The simple recipe
- The improved recipe
- The intermediate recipe

What is Body Butter?
Body butter is a very rich and moisturising product for your skin and is perfect if you need some intense moisture. It is much thicker than a cream or lotion, it's texture is much more like the butter you would spread on your toast!
Unlike lotions which are usually made with thinner oils, it's packed full of natural skincare butters such as cocoa butter and shea butter which make it thick and creamy.
However, there's more than one way to make body butter. There's two main types of body butter: Those that contain water and those that don't.
The simplest body butter recipe contains just oils and no water. This is probably the best place to start on your body butter journey. It is 100% natural, and simple to make.
The downside is that this type of body butter recipe can leave you with a greasy feeling, and be slow to absorb. We've designed the second body butter recipe to try and reduce this feeling, without adding water.
Our third body butter recipe is a water-based recipe. This means that you have to add a preservative, emulsifier and stabiliser to keep your body butter safe and stable. We've tried to select natural options for these ingredients, but the truth is that it is a compromise.
Why make homemade body butter?
It's scary how many chemicals you'll find in shop bought moisturisers and body butters. Next time you see one on the shelf just have a look at the ingredients label - it'll be very long and packed full of hidden nasties.
Our skin is our body's biggest organ and keeping it healthy is vital. When you put shop bought moisturisers on your skin, it absorbs not only the hydration but also the chemicals themselves. No one wants that and your body certainly doesn't!
The good news is that homemade body butter is an easy DIY project and is very simple to make with just a few key ingredients. All you have to do to follow our simplest recipe is melt and whip together some lovely natural products.

Adding essential oils to your body butter recipe
We haven't added essential oils to the first body butter recipe to keep it simple. However, you can add essential oils to it if you want. You should aim for 0.5-1% essential oils in the finished body butter which is in the range of 6g-13g for the first recipe.
However, not all essential oils are safe to add in these quantities. Here's how you can keep it safe:
- Before you decide on an essential oil, go to our technical documents section.
- Download the IFRA file.
- Check the maximum level % in category 5A
- If it is greater than 1%, you're good to go!
- If not, choose another essential oil.
Some examples of essential oils that aren't suitable are: Basil, lemongrass, may chang and ylang ylang.
Some citrus oils can be phototoxic, which means that they can cause burns if they're on your skin when it is exposed to sunlight. However, they can be used safely if you follow this advice:
- Our bergamot essential oil has been rectified to remove the phototoxic compounds, so it is safe to use in body butter.
- Our lemon, grapefruit and mandarin essential oils contain some phototoxic compounds because they are cold pressed. However, they are safe if you use them at 1% or less in your recipe.
- Our lime essential oil is also safe to use in this recipe.

Homemade whipped body butter recipe - the simple recipe
This is our simple whipped body butter recipe. Perfect for beginners!
You'll only need three ingredients, and it is 100% natural.
Ingredients:
- Organic, unrefined shea butter 500g
- Organic, extra virgin coconut oil 500g
- Sweet almond oil 350ml
- Essential oils (optional) - you can add fragrance to your body butter should you desire.
Method:
- Put your shea butter and coconut oil in a bowl and melt together gently. If you're using a metal bowl, put it over a saucepan of boiling water. Or, if you have a plastic bowl, you can use the microwave.
- Once your oils are melted together, add your sweet almond oil.
- Allow to cool a little, and then put your bowl in your fridge or freezer.
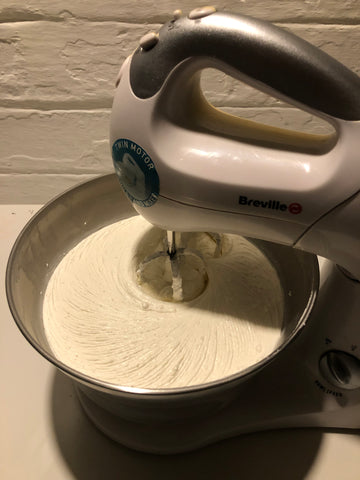
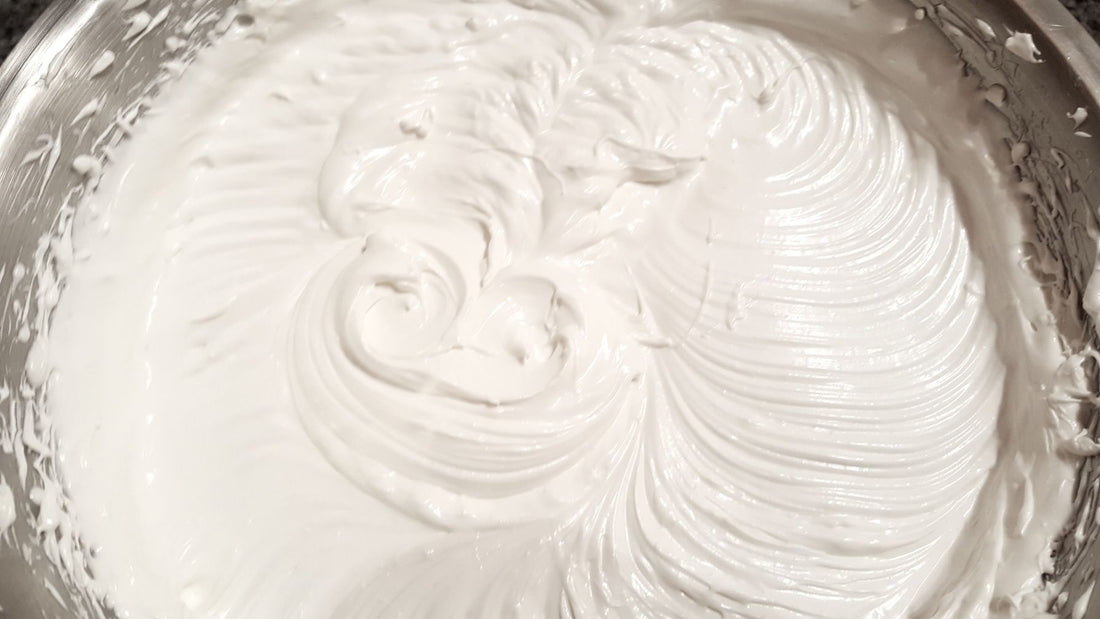
- Your mixture should start to look a little slushy once it is cold, now it is ready for whipping! Use an electric whisk (or a hand whisk if you’re feeling strong!) and whip it up until it looks similar to whipped cream.
- Once it is whipped, put it into tubs or jars (you can reuse the tubs the shea coconut oil came in!) and apply daily.
How to Store Homemade Natural Body Butter
The ingredients used in this homemade whipped body butter recipe are all natural, this means they can melt if they are left somewhere too warm. It's best to store the body butter in a cool, dry place and out of direct sunlight.
If it gets too warm and the body butter does melt, simple pop it in the fridge and then rewhip.
So there you go, from just three lovely natural ingredients you can create your own super hydrating homemade body butter! We hope you love this recipe as much as we do.
If you're looking for a whipped body butter recipe that is faster to absorb and less greasy, follow on to the next recipe!

Homemade whipped body butter - improved recipe
This DIY body butter recipe is based on the first, simple recipe. However, we've added a few ingredients:
- We reduced the amount of shea butter and added mango butter and cocoa butter. This helps the body butter feel lighter on the skin.
- We also changed the unrefined shea butter to refined shea butter, it gives you more control over the final scent of the body butter.
- We swapped the sweet almond oil for fractionated coconut oil. Again, this helps the body butter feel lighter.
- We added cetyl alcohol and arrowroot powder to give a better skin feel.
- We've added vitamin E oil as an antioxidant to give your body butter a better shelf life.

Ingredients
- Mango butter 400g
- Cocoa butter 200g
- Refined shea butter 150g
- Fractionated coconut oil 350g | 370ml
- Cetyl alcohol 80g
- Arrowroot powder 150g
- Vitamin E oil 10g | 10ml
- Lavender essential oil 10g | 11ml
- Geranium essential oil 2g | 2ml
Equipment
- Heatproof bowl
- Weighing scales
- Digital thermometer
- Electric whisk
- Jars for the finished body butter
- Piping bag (optional)
- Containers for weighing oils
Method

1. Weigh and melt your ingredients
- Weigh the cocoa butter and cetyl alcohol into a heatproof bowl.
- Melt above a pan of boiling water, or in a double boiler.
- Weigh the shea butter and mango butter.
- Add the butters into the melted cocoa butter.
- Mix well until melted and combined.

2. Cool your body butter
- Weigh the coconut oil.
- Remove the bowl from the heat.
- Add the coconut oil and mix until melted.
- Weigh the vitamin E oil and arrowroot powder.
- Cool the mixture to 40C.
- Add the vitamin E oil and arrowroot powder.
- Weigh the essential oils, and add to the mixture.
- Whisk until combined.
- Put it in the fridge until it starts to solidify.

3. Whip and pipe into jars
- Whip the body butter with an electric whisk until it reaches the consistency you want
- Scoop or pipe into jars
- Enjoy!
If you're looking for a body butter that has a consistency more like a commercial body butter, follow on to the next recipe!
However, it is much more in-depth and harder to make.

Homemade body butter - intermediate recipe
This body butter recipe is a bit more full-on. It contains water, which makes the body butter non-greasy and light. However, it adds complexity because you need an emulsifier, stabiliser and preservative.
This also means that the body butter isn't 100% natural (in our opinion). It is definitely more natural than many commercial body butters, but there's no escaping the fact that there are some synthetic ingredients involved.
Here's the ingredients we've added in more detail:
- Vegetable glycerin - works hand in hand with the water to lock moisture into your skin.
- Emulsifying wax - makes the water and oil stay combined in your body butter. However, it isn't 100% natural.
- Geogard Ultra - the most natural preservative on the market. It is mostly made from fermented natural glucose.
- Hydroxyethyl cellulose - it isn't as scary as it sounds! It is derived from natural cellulose from cotton. But it does go through a chemical process to transform it into the thickener and stabiliser that we know and love. It helps your body butter stay in the right consistency.
You will also need to test the pH, and adjust it if necessary. This usually involves working with sodium hydroxide, which is quite hazardous. Don't skip the gloves and goggles. They're definitely necessary!
Equipment
- Heatproof bowl
- Weighing scales accurate to 0.1g
- Digital thermometer
- Stick blender
- Jars for the finished body butter
- Digital pH meter
- Gloves
- Goggles
- Containers for weighing oils
- Pipette
Ingredients
- Water 200g
- Vegetable glycerin 50g | 40ml
- Refined shea butter 40g
- Refined avocado oil 40g | 43ml
- Emulsifying wax SLS free 16g
- Sodium hydroxide 10g
- Geogard Ultra 5g
- Hydroxyethyl cellulose 2g
- Grapefruit essential oil 3g | 4ml
Method

1. Heated water phase
- Weigh the water, vegetable glycerin, hydroxyethyl cellulose and Geogard Ultra.
- Combine in a heatproof bowl.
- Heat over a pan of boiling water or in a double boiler.
- Mix well until the Geogard Ultra has dissolved.
- Remove from the heat.

2. Heated oil phase
- Weigh the shea butter, avocado oil and emulsifying wax.
- Heat over a pan of boiling water or in a double boiler.
- Mix well until the shea butter and emulsifying wax has melted.
- Remove from the heat.

3. Cooling and whipping process
- Add the liquid oil phase to the water phase.
- Blend with a stick blender in short pulses for 1-2 minutes
- Allow to cool while stirring gently until it starts to thicken or clump together
- Blend again with the stick blender for a minute until it thickens more.
- Allow to cool to around 25C
4. Test the pH
- The pH of body butter should be in the range 4.5-5.5
- Take 2g of the body butter and mix it in 18g of water until dissolved.
- Measure the pH using a digital pH meter.
- The pH of our body butter was 3.8, which is too low for a body butter.

5. Adjust the pH
- If the pH of your body butter is under 4.5, make a sodium hydroxide solution.
- Put your gloves and goggles on.
- Weigh 10g of sodium hydroxide.
- Weigh 90g water.
- Add the sodium hydroxide to the water and stir until dissolved.
- Using a pipette, add 0.5g of the sodium hydroxide solution into the diluted body butter that you used for pH testing.
- Test the pH again.
- If the pH is still under 4.5, repeat the last two steps until the pH is 4.5-5.5.
- Record the final amount of sodium hydroxide solution that you added to your diluted body butter.
- Add the same amount of sodium hydroxide solution to your main batch of body butter.
- If the pH of the body butter was over 5.5, you can follow this process but use 10g citric acid diluted in 90g water.

6. Pour into containers
- Sterilise your containers with boiling water or isopropyl alcohol
- Pour the body butter into the containers
- Enjoy!
Continue Reading
Now that you've learnt how to make body butter, why not take your natural beauty routine to the next level? Read on to lean how to make other natural products.


6 comments
This recipe was so straightforward and easy. The result is wonderful. I didn’t add any essential oils in case of sensitivity. The smell is lovely and stays on my skin all day.